

Few weeks back, we decided to migrate our complete infrastructure to a single AWS region (which is closer to our client) for achieving better latencies and less data transfer cost.
There were multiple components migrated to a single AWS region and ElasticSearch was one of them. Although migration steps are documented on ElasticSearch website, there are multiple AWS concepts one needs to understand to execute it properly. Here, we have tried to dive deep into migration steps and login behind those steps.
ElasticSearch data migration is trivial and only requires knowledge of ElasticSearch in case of a self managed publicly accessible cluster but things get tricky when it comes to AWS managed clusters as AWS doesn’t allow you to access config yml file and there are a lot of other AWS IAM concepts one needs to understand for executing it properly.
In this blog we are going to discuss the step-by-step AWS managed ElasticSearch data migration process using snapshot and restore methods and how it is different from self hosted ElasticSearch data migration in detail.
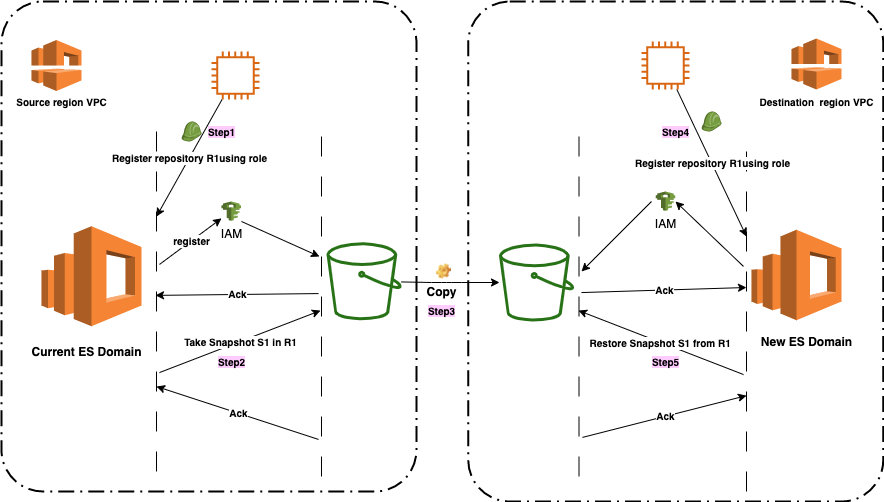
Overview
Assumtion: ElasticSearch domain need to be created in destination region with same cluster configuration.
- Take manual snapshot of ElasticSearch domain data into source S3 bucket
- Copy source S3 bucket data into destination S3 bucket
- Restore data from S3 bucket into new ElasticSearch domain
Take snapshot
Snapshot: A snapshot is a backup taken from a running ElasticSearch cluster. You can take snapshots of an entire cluster, including all its data streams and indices. You can also take snapshots of only specific data streams or indices in the cluster.
Repository: The repository is a place where you can store all your snapshots data.
Note: You must register a snapshot repository before you can perform snapshot and restore operations.You have multiple options available for defining a repository given that both old and new ElasticSearch should be able to access that location like a shared file system, AWS S3, HDFS etc. We will be discussing only the AWS S3 option in this blog post.
Register snapshot repository using AWS S3 bucket
ElasticSearch provides APIs for both registering repositories and taking snapshots.
How roles and user works in AWS
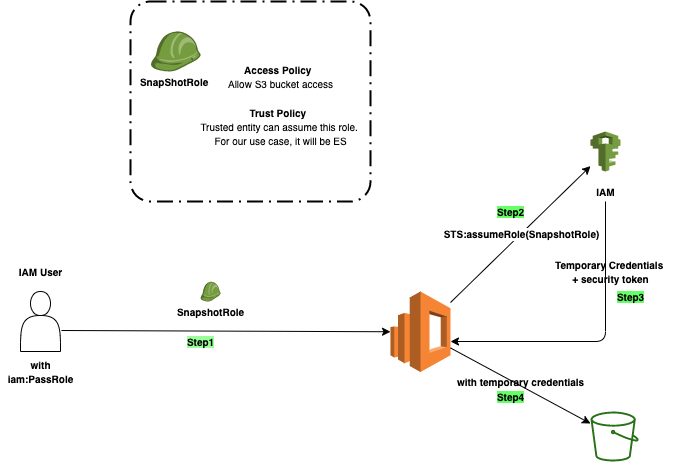
- Role: An IAM role is an AWS Identity and Access Management (IAM) entity with permissions to make AWS service requests. IAM roles cannot make direct requests to AWS services; they are meant to be assumed by authorized entities, such as IAM users, applications, or AWS services such as EC2, ES etc
- AssumeRole: Trusted entity can assume role and performs authorized action using temporary credentials.
- PassRole To allow a user to delegate role to an AWS service, you must grant the PassRole permission to the user.
Let’s create a role to delegate permission to Amazon Elasticsearch Service to take a snapshot into S3.
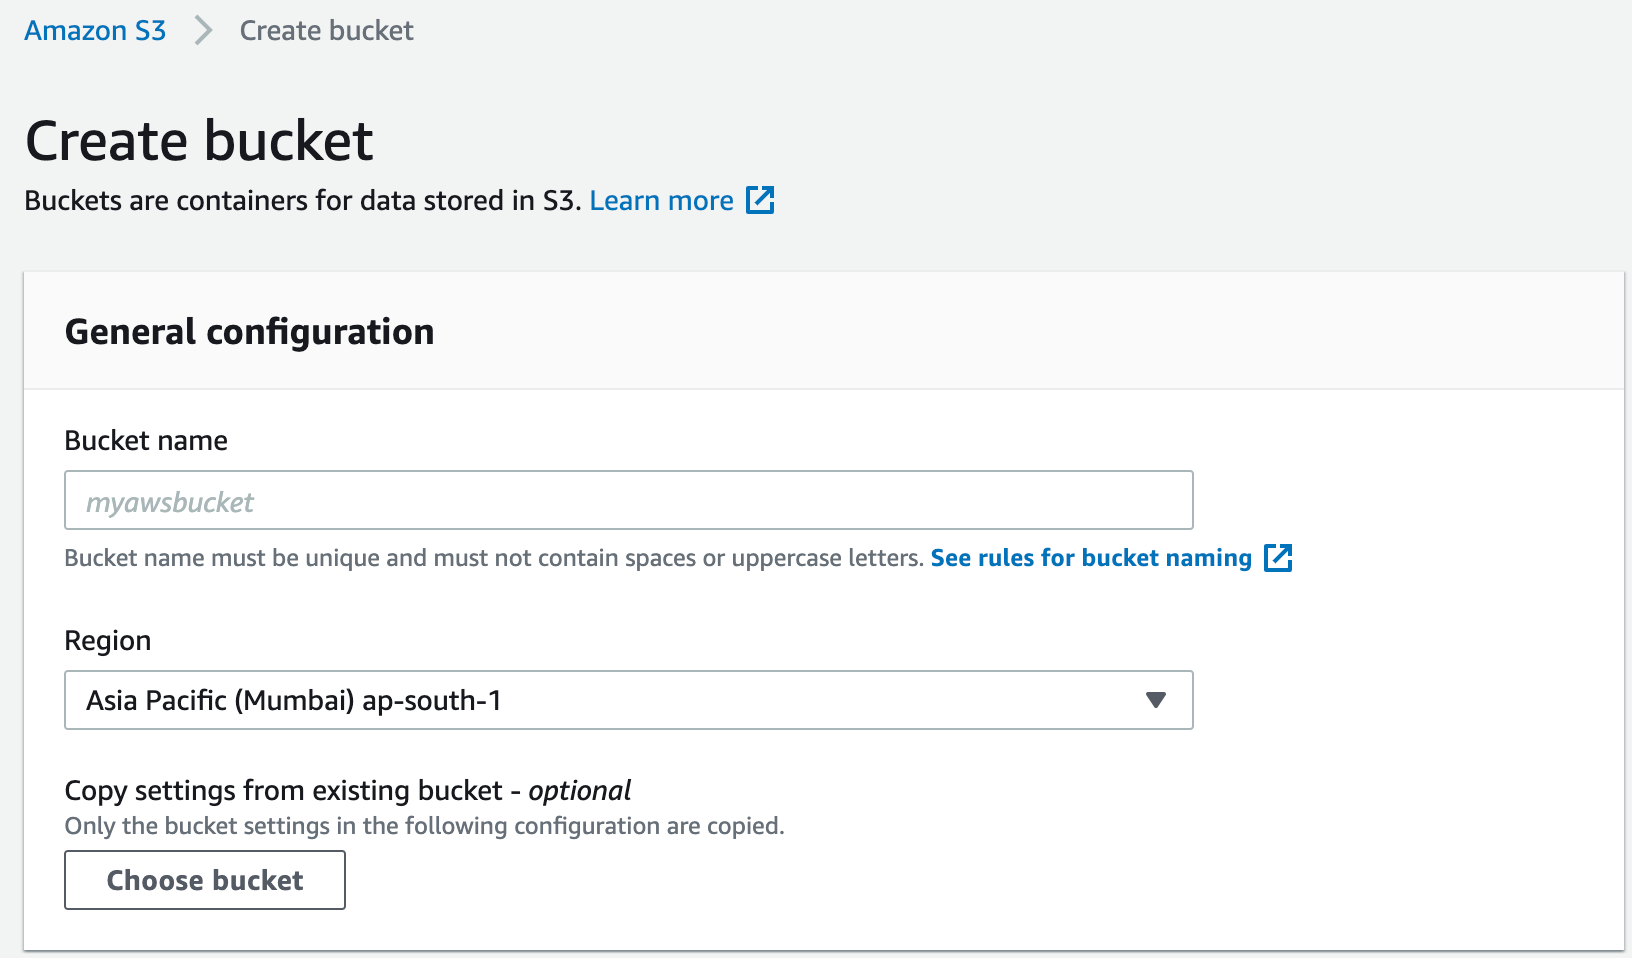
Create S3 Bucket and Configure IAM Role
- Create S3 bucket in the same region where the ElasticSearch domain exists and another bucket in destination region.
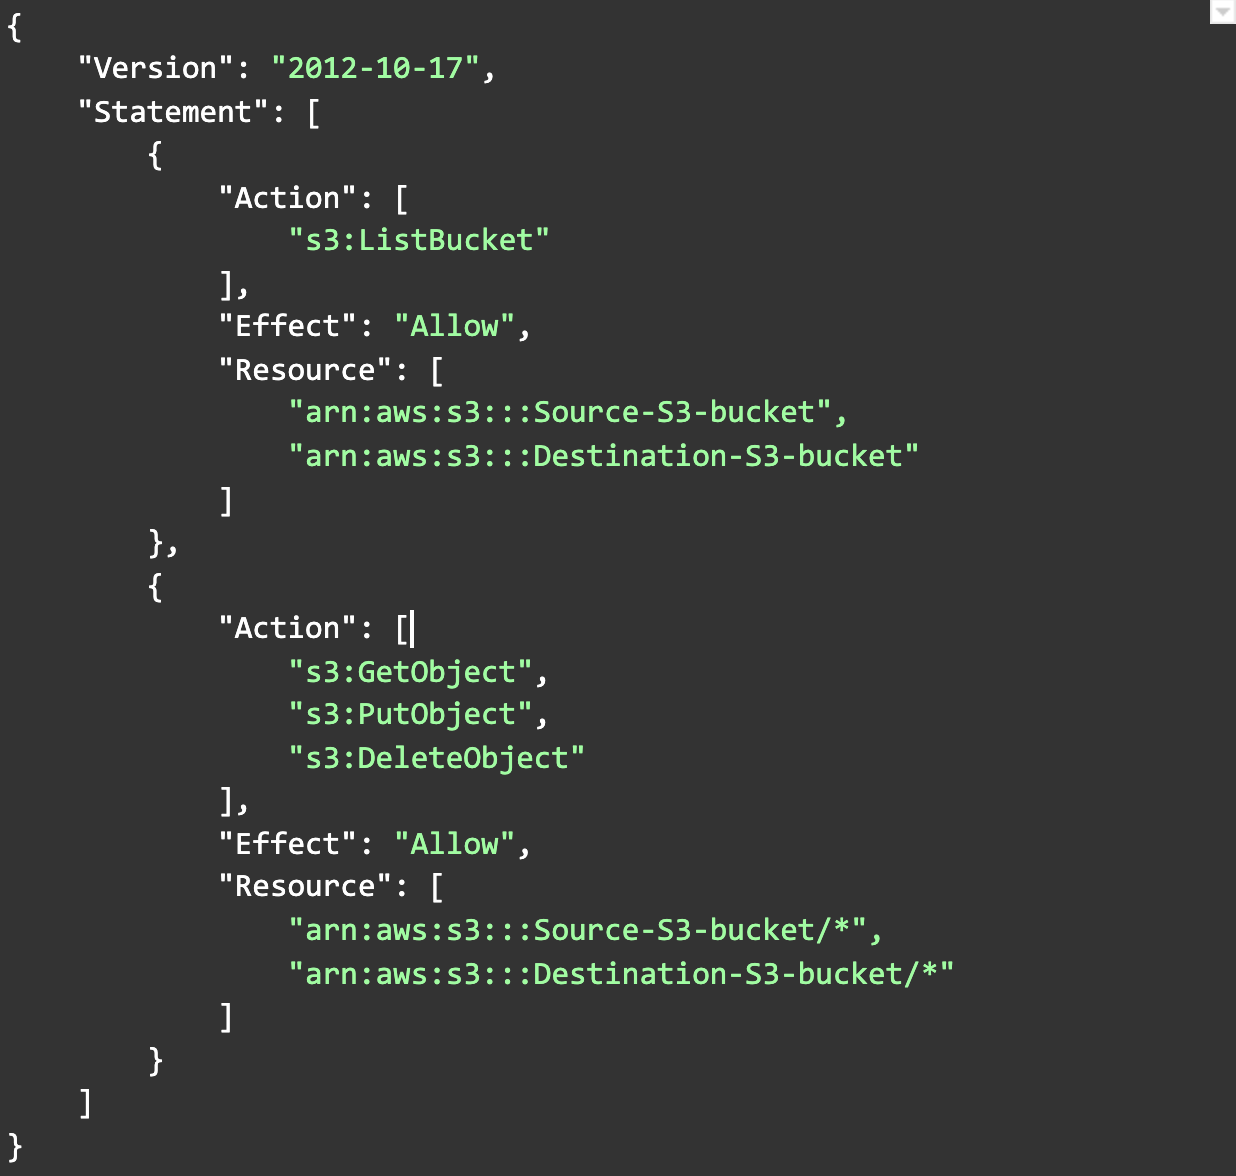
- Create a new role theSnapshotRole without any permissions.
- Create below Policy and add it to the newly created role. It will enable ElasticSearch to access both S3 bucket.
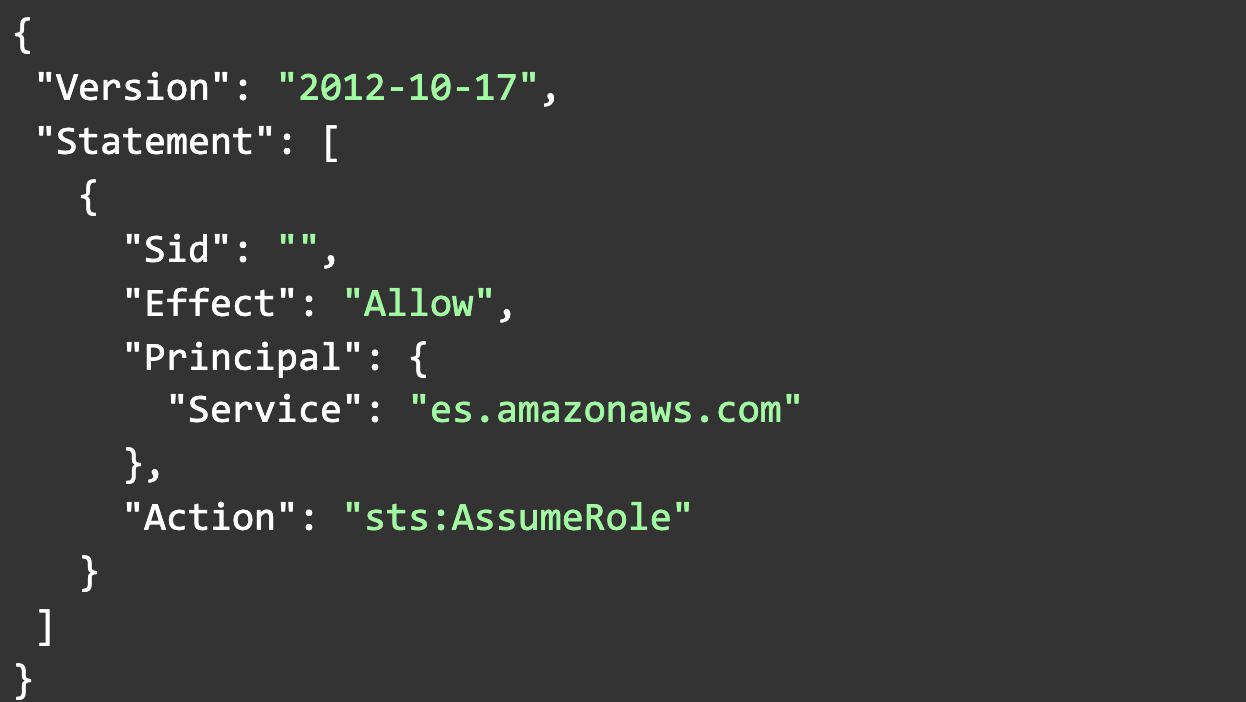
- Update trust relationship for theSnapshotRole role.
Note: We need to update trust relationships for newly created roles which will enable ElasticSearch to assume roles. This assume role permission will allow ElasticSearch service to use theSnapshotRole as its own.
Configure IAM user
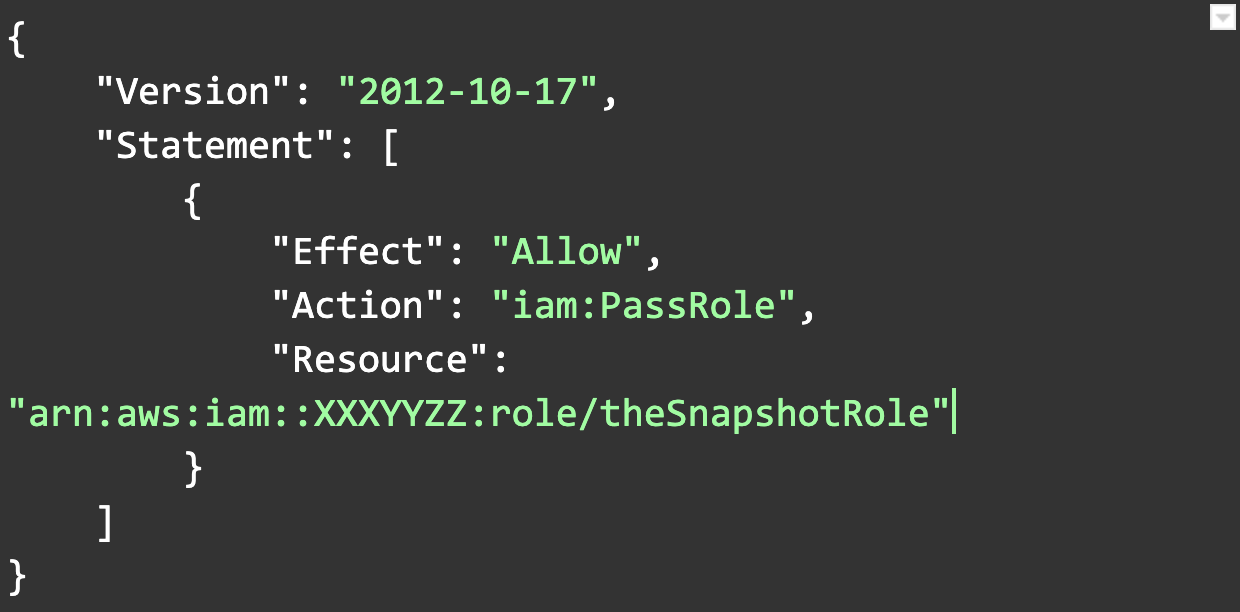
Once we are done with role creation, we need to create new user or we need to give PassRole permission to existing user which will allow user to pass newly created theSnapshotRole to ElasticSearch service and as theSnapshotRole already configured with assumeRole permission, it can access S3 bucket.
- Create below policy and attach it with user
Register snapshot repository
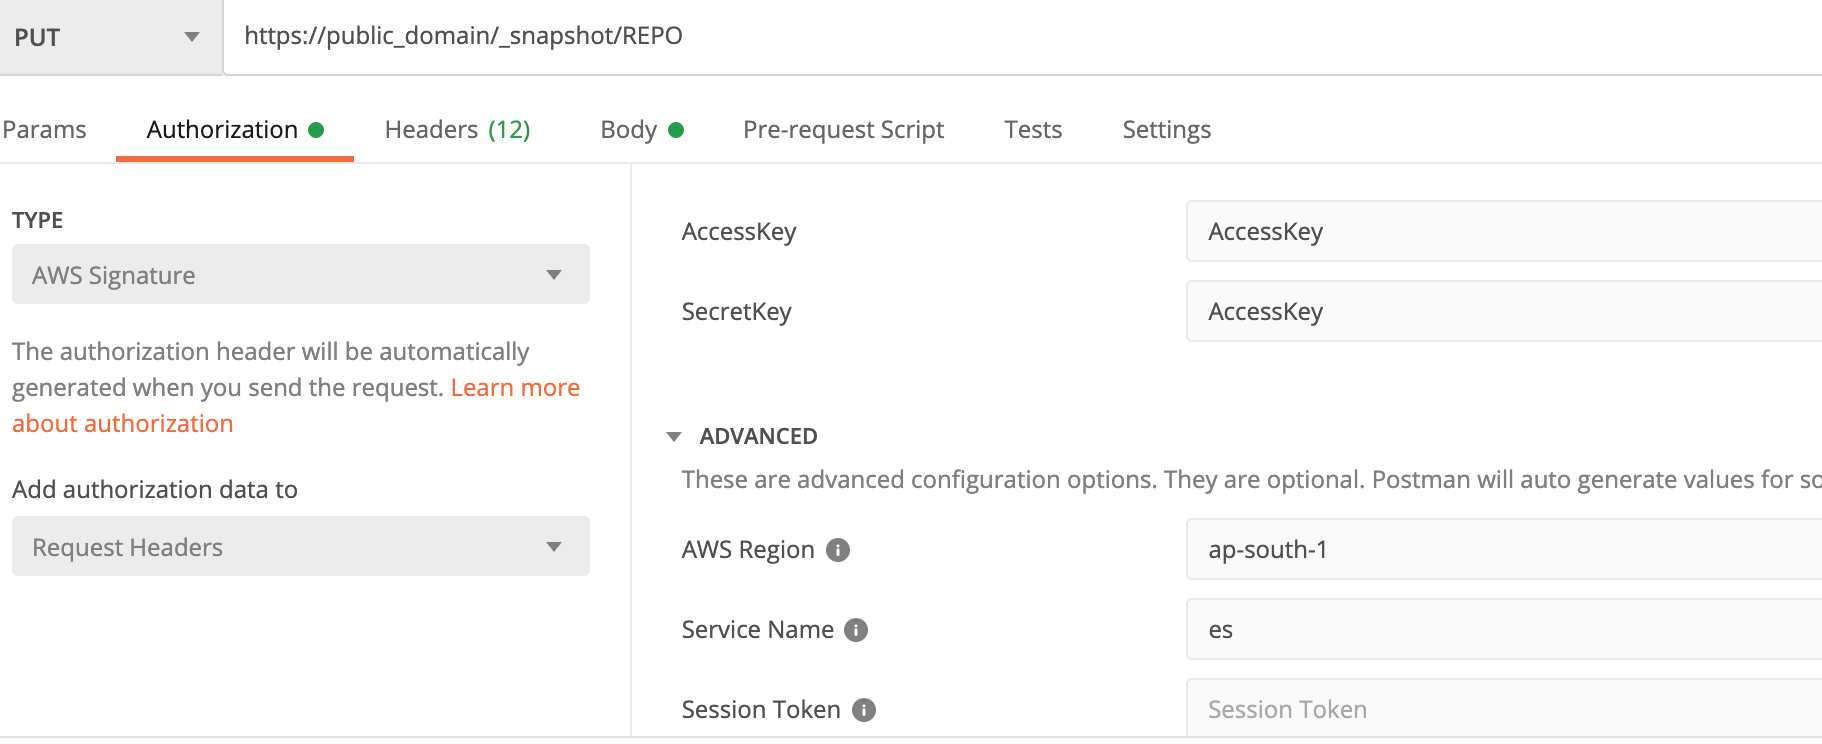
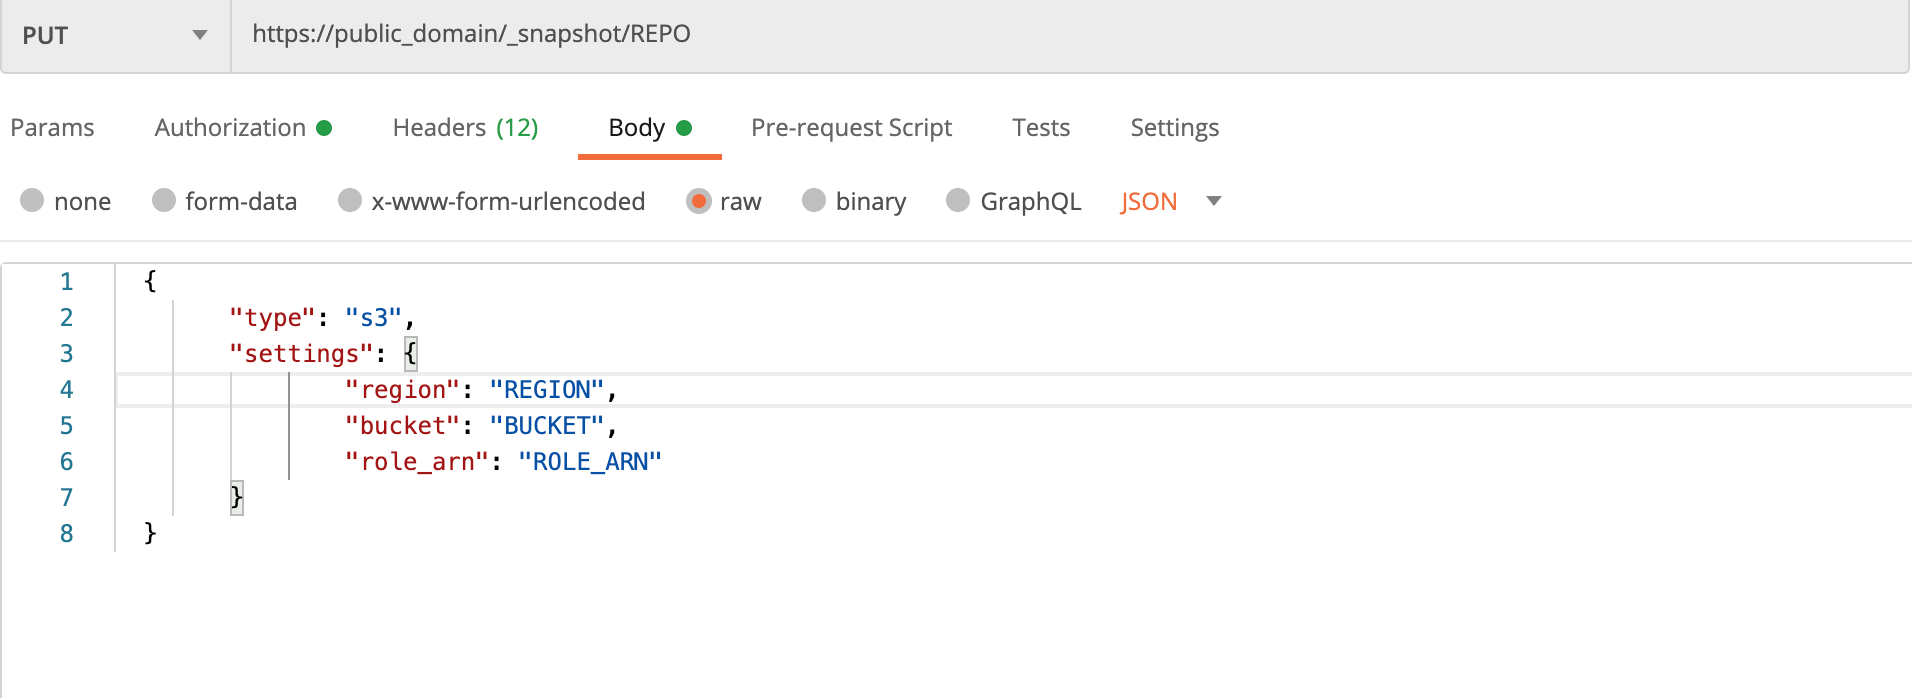
Once we are done with the new role and user creation, let's start with repository registration. There are two ways of registering repositories on ElasticSearch.
- Using postman if your ElasticSearch cluster can be accessed directly.
Postman
- If your ElasticSearch cluster is in a VPC that you cannot access directly, you will need access to EC2 which is in the same VPC and that can execute below scripts.
Python script
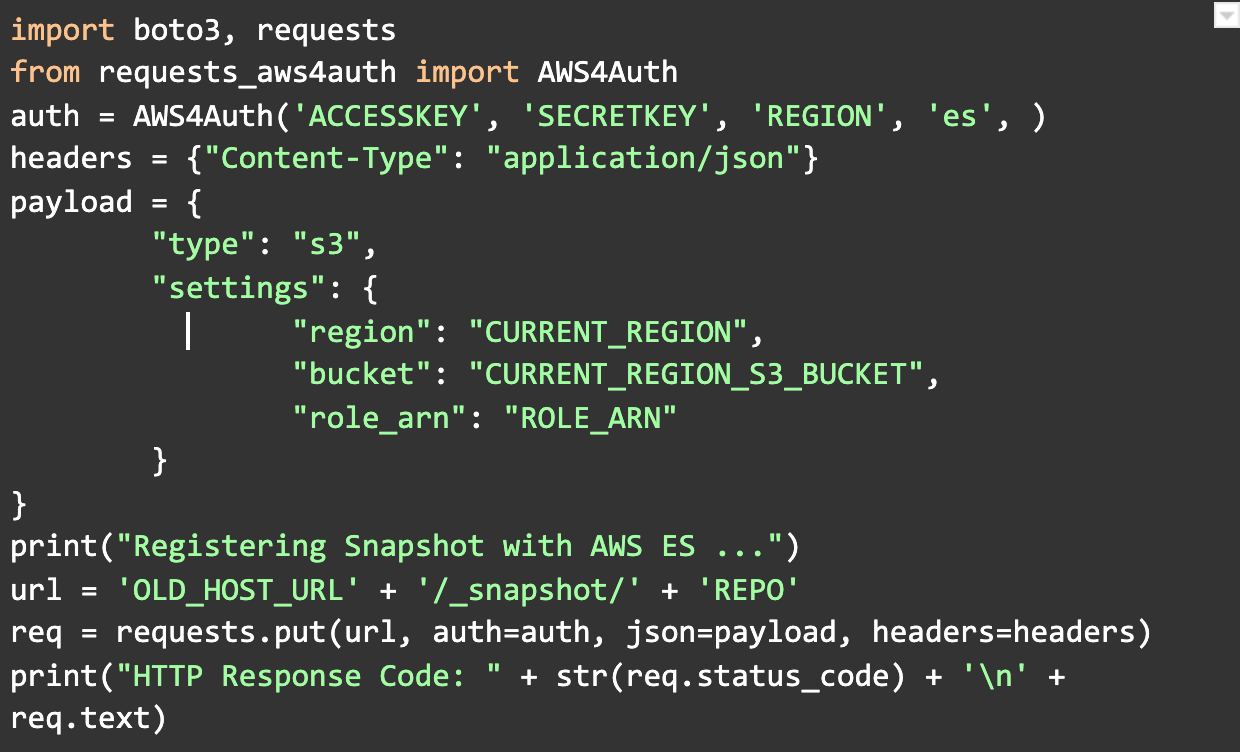
Response

Take snapshot of current ElasticSearch data
After registering repository successfully, we need to run below script for taking snapshot of current ElasticSearch data.
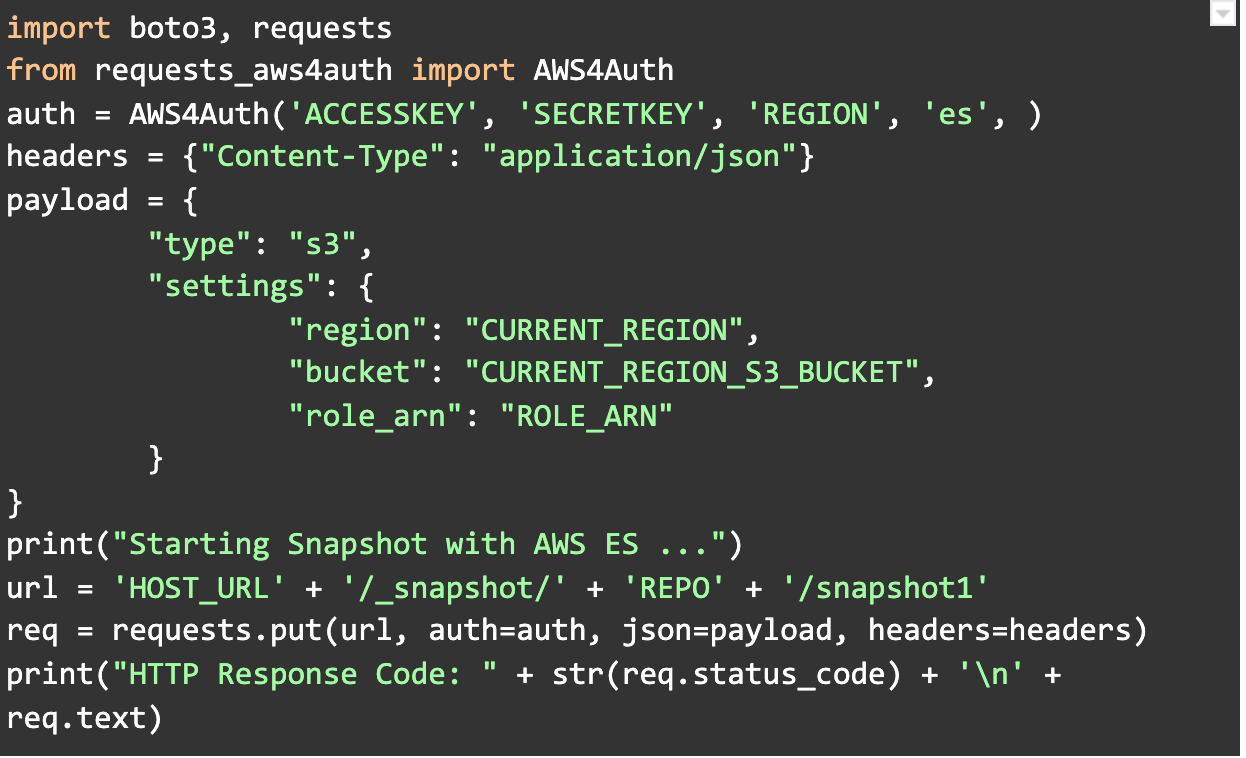
Response

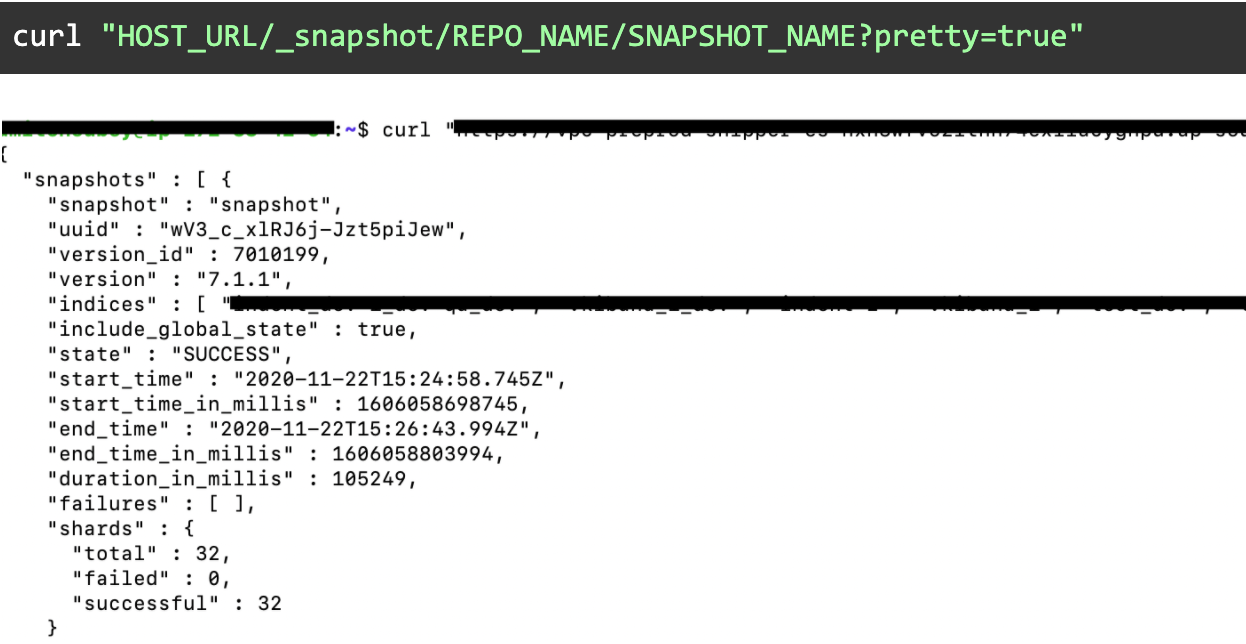
Verify snapshot
Copy S3 data to new region s3
You can copy s3 bucket data using AWS console
aws s3 cp s3://awsexamplesourcebucket s3://awsexampledestinationbucket
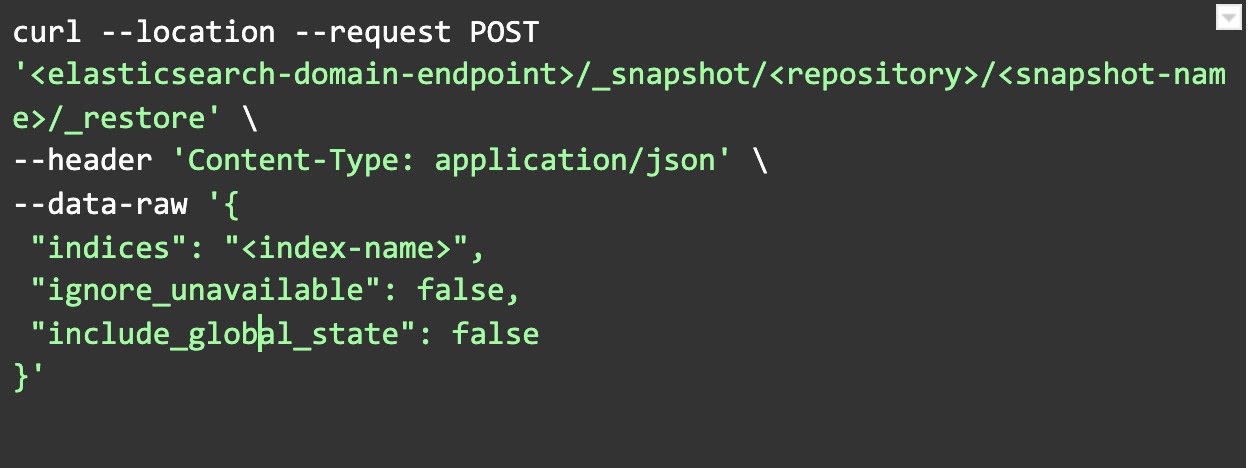
Restore Snapshot
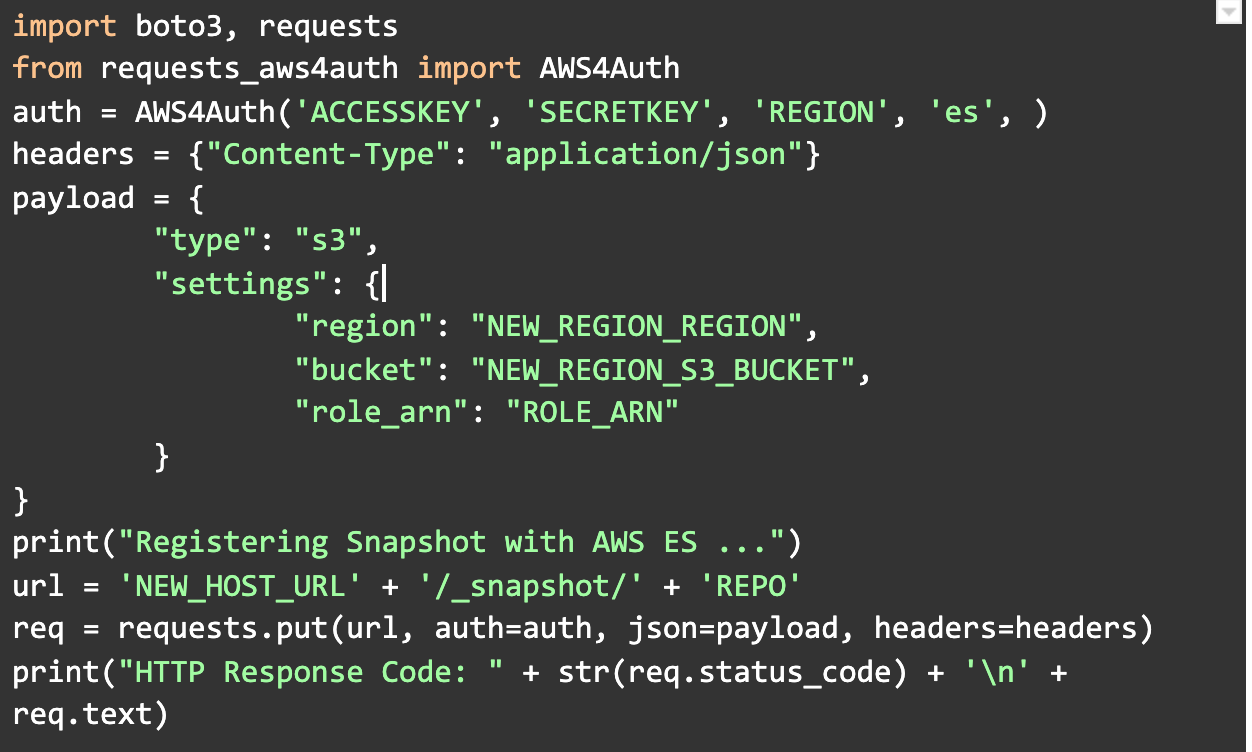
- Register current snapshot repository with new ElasticSearch domain
- Restore snapshot of old ElasticSearch data into new ElasticSearch
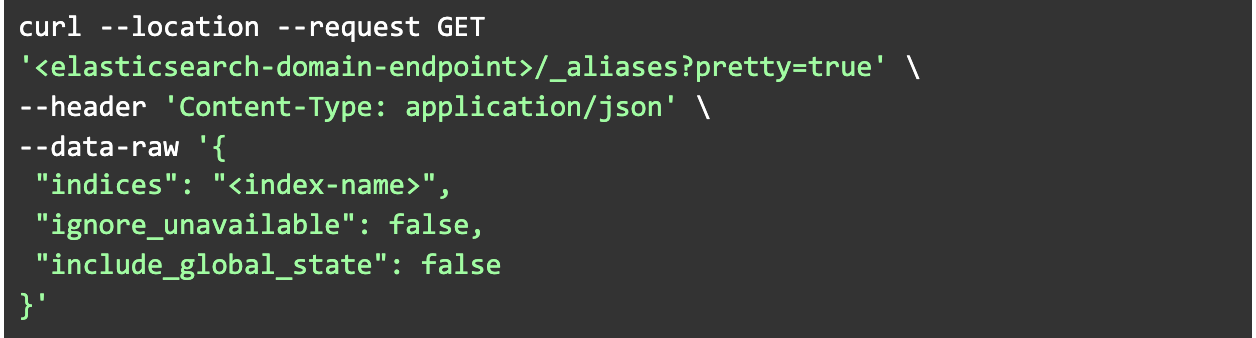
- Verify restored indexes and alias.
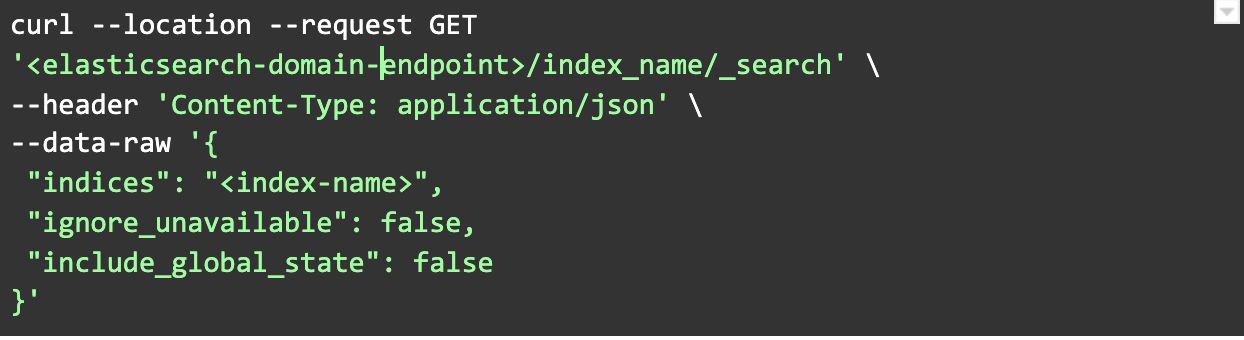
- Verify index data
Take-away!
- AWS managed ElasticSearch provides us with a lot of benefits in terms of managing and scaling our ElasticSearch cluster but also restricts us to access configuration files which leaves us with snapshot-restore method when we want to migrate from one domain to another. Snapshot-restore method has its own downside in terms of write downtime during the migration process which is ranging from a few minutes to hours depending on data size.
- Make sure you are running your services using ElasticSearch in read-only mode during the migration process to avoid data loss.
References:
 Elastic